Whether you are a professional welder or a hobbyist, understanding the duty cycle is essential to ensure the longevity of your welding equipment and maintain consistent performance. This state-of-the-art calculator takes into consideration factors such as amperage, weld time, and cooling time, providing you with accurate duty cycle information tailored to your specific welding setup.
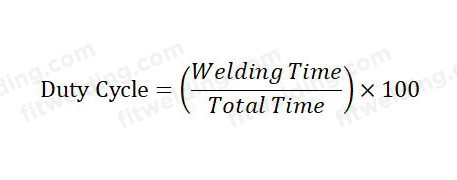
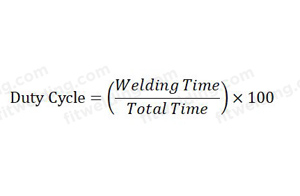
The following formula is used to this calculator for calculate the welding duty cycle and cooling cycle:
DC=(WT/TT)x100
CC=100-DC
Variables:
- DC is the welding duty cycle
- WT is the welding time
- TT is the total time
- CC is the cooling cycle
- 100 is the total cycle in percentage
With the Welding Duty Cycle Calculator, you can now make informed decisions about your welding projects, boost productivity, and prevent costly equipment failures due to overheating. By optimizing your duty cycle, you can extend the lifespan of your welding machine and achieve better results in less time.
Don’t let guesswork compromise your welding operations. Empower yourself with the Welding Duty Cycle Calculator and revolutionize the way you weld. Ensure efficient and uninterrupted workflow by making the most of this powerful tool. Say goodbye to trial and error, and hello to precision and productivity.
What is a welding duty cycle?
A welding duty cycle refers to the amount of time a welding machine can operate within a given time frame without overheating. It is represented as a percentage and is typically specified by the manufacturer. For example, a duty cycle of 50% means that the welding machine can be used for 5 minutes out of every 10 minutes before it needs to cool down.
Understanding the duty cycle is crucial because exceeding the recommended usage time can lead to overheating, which can damage the machine and compromise the quality of your welds. By knowing the duty cycle of your welding equipment, you can plan your work accordingly and avoid unnecessary downtime.

How to calculate welding duty cycle
Calculating the welding duty cycle is a straightforward process. To determine the duty cycle of your welding machine, follow these steps:
- Identify the rated amperage of your welding machine. This information is usually provided by the manufacturer and can be found in the machine’s manual or specifications.
- Determine the duty cycle percentage specified by the manufacturer. This information is also typically provided in the machine’s manual or specifications.
- Calculate the maximum weld time allowed based on the duty cycle percentage. For example, if the duty cycle is 50%, the maximum weld time would be half of the total cycle time.
- Calculate the cooling time required based on the duty cycle percentage. Cooling time refers to the duration the machine needs to rest and cool down after reaching its duty cycle limit.
- Add the maximum weld time and cooling time to get the total cycle time. This represents the duration of one duty cycle.
- Repeat the calculation for longer welding projects by factoring in multiple duty cycles.
By following these steps, you can accurately determine the duty cycle of your welding machine and plan your welding operations accordingly.
Welding duty cycle chart
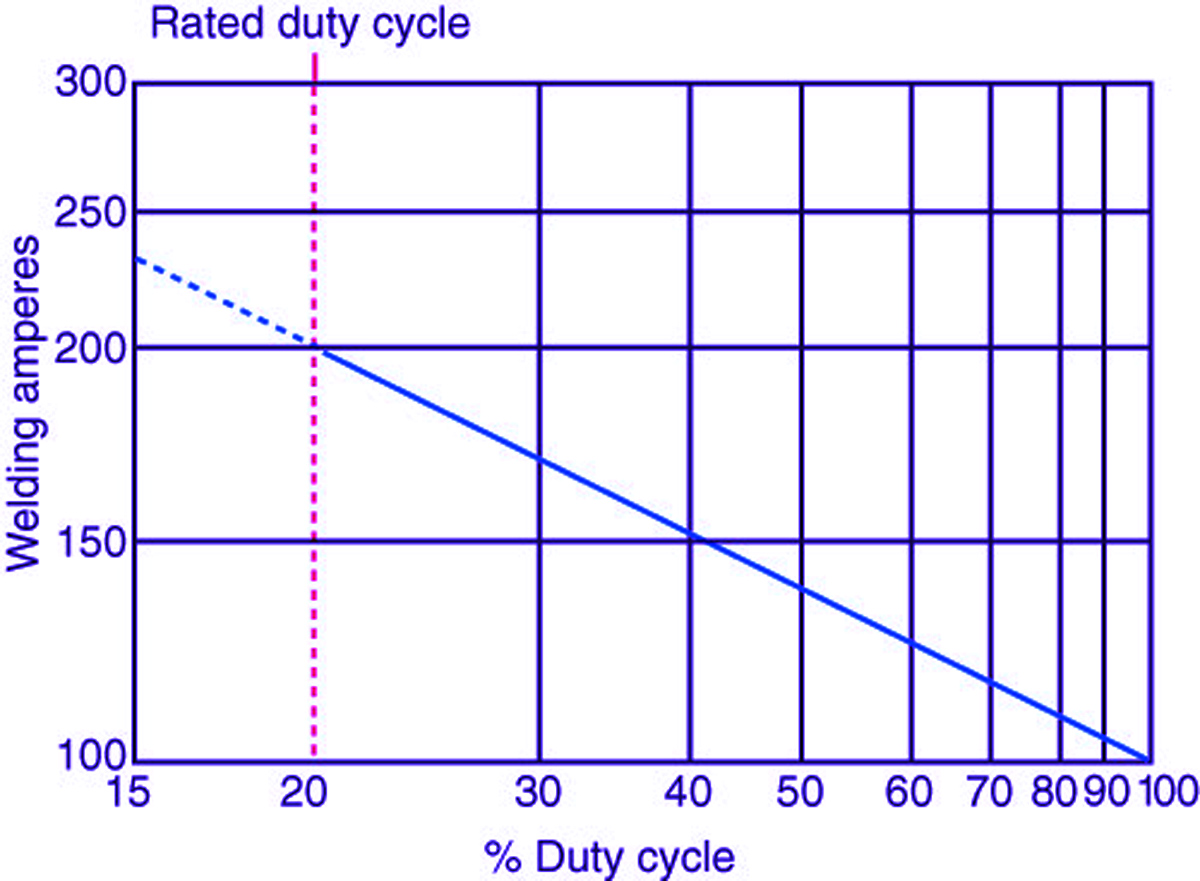
A welding duty cycle chart is an essential tool for welders to determine the maximum amount of time they can weld continuously without overheating their equipment. The duty cycle refers to the percentage of a 10-minute period that a welder can operate before it needs to cool down. This chart provides valuable information on the duty cycles for different welding machines and their corresponding amperages. It helps welders plan their work and prevents equipment damage due to overheating.
By referring to a welding duty cycle chart, welders can ensure that they are operating within the recommended parameters for their specific welding machine. Different machines have different duty cycles, which are determined by factors such as the size of the machine, its cooling system, and its overall design. The duty cycle is typically expressed as a percentage, indicating the amount of time a welder can operate in a 10-minute interval.
Knowing the duty cycle of a welding machine is crucial because exceeding it can lead to overheating and damage to both the machine and the workpiece. Welding at higher amperages or for longer durations than recommended can result in decreased performance, increased downtime for cooling, and even permanent damage to the equipment. The duty cycle chart acts as a guide for welders to prevent such issues and maximize productivity.
To use a welding duty cycle chart effectively, welders should first identify the amperage they will be using for their specific welding application. Then, by locating that amperage on the chart, they can determine the corresponding duty cycle. This information allows welders to plan their work accordingly, taking breaks when necessary to prevent overheating.

A welding duty cycle chart is an indispensable resource for welders. It provides valuable information on the maximum operating time for different amperages of welding machines. By adhering to the recommended duty cycle, welders can prevent equipment damage, optimize their productivity, and ensure the quality of their welds.
Examples of welding duty cycle calculations
To illustrate how duty cycle calculations work, let’s consider a few examples:
Example 1: – Rated amperage: 200A – Duty cycle: 60% – Maximum weld time: 60% of the total cycle time – Cooling time: 40% of the total cycle time
Total cycle time = Maximum weld time + Cooling time
Example 2: – Rated amperage: 300A – Duty cycle: 40% – Maximum weld time: 40% of the total cycle time – Cooling time: 60% of the total cycle time
Total cycle time = Maximum weld time + Cooling time
By plugging in the appropriate values for your specific welding machine, you can calculate the duty cycle and plan your welding operations accordingly.
Common misconceptions about welding duty cycle
There are several misconceptions surrounding welding duty cycle that can lead to confusion and potentially compromise the welding process. Let’s debunk some of the common misconceptions:
Duty cycle is the same for all welding machines: Duty cycle percentages can vary significantly between different welding machines. It is important to refer to the manufacturer’s specifications to determine the duty cycle of your specific machine.
Duty cycle only applies to professional welders: Duty cycle is relevant to both professional welders and hobbyists. Regardless of your skill level, understanding and optimizing the duty cycle can improve your welding operations.
Duty cycle is a fixed value: Duty cycle percentages are specified by the manufacturer and can vary from machine to machine. It is important to consult the machine’s manual or specifications for the correct duty cycle information.
Duty cycle only applies to continuous welding: Duty cycle applies to any welding process that generates heat, including continuous welding, spot welding, and intermittent welding. It is important to consider the duty cycle for all welding operations.
By clearing up these misconceptions, you can have a better understanding of the duty cycle and make informed decisions in your welding projects.
Tools and resources for calculating welding duty cycle
Several tools and resources are available to help you calculate the duty cycle of your welding machine more easily. Here are a few options:
Online duty cycle calculators: Many websites offer free online calculators that allow you to input the rated amperage and duty cycle percentage to obtain the corresponding weld time and cooling time.
Manufacturer’s manuals and specifications: The manufacturer’s manual or specifications for your welding machine often provide detailed information about the duty cycle and may even include sample calculations.
Welding apps: There are mobile applications available that feature duty cycle calculators along with other useful welding-related tools and resources.
By utilizing these tools and resources, you can streamline the duty cycle calculation process and ensure accurate results for your welding machine.
Final Thoughts
The Welding Duty Cycle Calculator revolutionizes the way welders approach their projects. By understanding and optimizing the duty cycle, welders can maximize productivity, prevent equipment failures, and achieve better results in less time.
With the Welding Duty Cycle Calculator, welders can make informed decisions about their welding operations, extend the lifespan of their welding machines, and experience uninterrupted workflow. By utilizing this powerful tool, welders can say goodbye to guesswork and hello to precision and productivity.
Don’t let overheating compromise your welding operations. Empower yourself with the Welding Duty Cycle Calculator and take your welding skills to new heights. Start today and experience the difference it makes in your welding projects. Your welding equipment will thank you, and your clients will be impressed with the quality of your work.
